Test in production without watermarks.
Works wherever you need it to.
Get 30 days of fully functional product.
Have it up and running in minutes.
Full access to our support engineering team during your product trial
File uploading is a common feature in web applications, and making it user-friendly is crucial for a good user experience. One popular library that simplifies this process is Dropzone.js. When combined with React, Dropzone can be a powerful tool for implementing drag-and-drop file uploads. The react-dropzone integrates perfectly and seamlessly with minimal development efforts. This article will guide you through integrating Dropzone with a React application using the react-dropzone package, an excellent wrapper around the Dropzone.js library.
In this article, we will also look at IronPDF NPM package to generate, edit and manage PDF documents.
Dropzone provides various features that make file uploading seamless:
Allows users to drag and drop files to enable file selection. Adds file dialog programmatically.
Displays default image thumbnail previews from dropped files. The display file previews help to enhance the UI readability.
Supports uploading multiple files at once.
Highly customizable with various options and callbacks. Can customize file dialog opening or file select dialog
Upload large files using chunked upload.
File dialog cancel callback and also browser image resizing events can be handled
Before integrating Dropzone, ensure you have a React application set up. If you don't have one, you can create a new React project using Create React App:
npx create-react-app dropzone-demo
cd dropzone-demoTo use Dropzone in your React project, you need to install the react-dropzone package:
npm install react-dropzone
or
yarn add react-dropzoneHere’s a simple example of react-dropzone usage in a React component:
import React, { useCallback } from 'react';
import { useDropzone } from 'react-dropzone'; // import dropzone
const DropzoneComponent = () => {
  const onDrop = useCallback((acceptedFiles) => {
    console.log(acceptedFiles);
  }, []);
  const { getRootProps, getInputProps, isDragActive } = useDropzone({ onDrop });
  return (
    <div {...getRootProps()} style={dropzoneStyle}>
      {
        isDragActive ?
          <p>Drop the files here ...</p> :
          <p>Drag 'n' drop some files here, or click to select files</p>
      }
    </div>
  );
};
const dropzoneStyle = {
  border: '2px dashed #0087F7',
  borderRadius: '5px',
  padding: '20px',
  textAlign: 'center',
  cursor: 'pointer'
};
export default DropzoneComponent;When files are dropped or selected, the onDrop callback receives an array of accepted files. You can then handle the files, such as uploading them to a server. Here’s how you can extend the onDrop callback to upload files using fetch:
const onDrop = useCallback((acceptedFiles) => {
  const formData = new FormData();
  acceptedFiles.forEach((file) => {
    formData.append('files', file);
  });
  fetch('https://your-upload-endpoint', {
    method: 'POST',
    body: formData,
  })
  .then(response => response.json())
  .then(data => console.log(data))
  .catch(error => console.error('Error:', error));
}, []);You can also display previews of the uploaded files. Here’s an example of how to do this:
import React, { useCallback, useState } from 'react';
import { useDropzone } from 'react-dropzone';
const DropzoneComponent = () => {
  const [files, setFiles] = useState([]);
  const onDrop = useCallback((acceptedFiles) => {
    setFiles(acceptedFiles.map(file => Object.assign(file, {
      preview: URL.createObjectURL(file)
    })));
  }, []);
  const { getRootProps, getInputProps, isDragActive } = useDropzone({ onDrop });
  const thumbs = files.map(file => (
    <div key={file.name}>
      <img
        src={file.preview}
        style={{ width: '100px', height: '100px' }}
        alt={file.name}
      />
    </div>
  ));
  return (
    <div>
      <div {...getRootProps()} style={dropzoneStyle}>
        {
          isDragActive ?
            <p>Drop the files here ...</p> :
            <p>Drag 'n' drop some files here, or click to select files</p>
        }
      </div>
      <div>
        {thumbs}
      </div>
    </div>
  );
};
const dropzoneStyle = {
  border: '2px dashed #0087F7',
  borderRadius: '5px',
  padding: '20px',
  textAlign: 'center',
  cursor: 'pointer'
};
export default DropzoneComponent;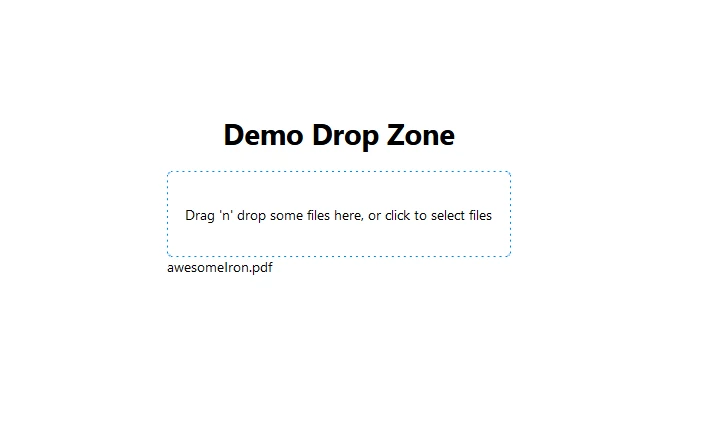
It’s essential to revoke the object URLs to avoid memory leaks. You can achieve this by using the useEffect hook:
import { useEffect } from 'react';
useEffect(() => {
  // Make sure to revoke the data uris to avoid memory leaks
  return () => files.forEach(file => URL.revokeObjectURL(file.preview));
}, [files]);IronPDF is a powerful npm package designed to facilitate PDF generation within Node.js applications. It allows you to create PDF documents from HTML content, URLs, or even existing PDF files. Whether you're generating invoices, reports, or any other type of document, IronPDF simplifies the process with its intuitive API and robust feature set.
Convert HTML content into PDF documents effortlessly. This feature is particularly useful for generating dynamic PDFs from web content.
Generate PDFs directly from URLs. This allows you to capture the content of web pages and save them as PDF files programmatically.
Merge, split, and manipulate existing PDF documents with ease. IronPDF provides functionalities to manipulate PDF files, such as appending pages, splitting documents, and more.
Secure your PDF documents by encrypting them with passwords or applying digital signatures. IronPDF offers options to protect your sensitive documents from unauthorized access.
Produce high-quality PDF documents with precise rendering of text, images, and formatting. IronPDF ensures that your generated PDFs maintain fidelity to the original content.
IronPDF is compatible with various platforms, including Windows, Linux, and macOS, making it suitable for a wide range of development environments.
Easily integrate IronPDF into your Node.js applications using its npm package. The API is well-documented, making it straightforward to incorporate PDF generation capabilities into your projects.
Whether you're building a web application, a server-side script, or a command-line tool, IronPDF empowers you to create professional-grade PDF documents efficiently and reliably.
Install Dependencies: First, create a new Next.js project (if you haven’t already) using the following command: Refer to the setup page.
npx create-next-app@latest demo-dropzone-ironpdf --use-npm --example "https://github.com/vercel/next-learn/tree/main/basics/learn-starter"Next, navigate to your project directory:
cd demo-dropzone-ironpdfInstall the required packages:
npm install @ironsoftware/ironpdf
npm install react-dropzone
Create a PDF: Now, let’s create a simple example of generating a PDF using IronPDF. In your Next.js component (e.g., pages/index.tsx), add the following code:
import Head from 'next/head';
import styles from '../styles/Home.module.css';
import {ToastContainer, toast} from 'react-toastify';
import 'react-toastify/dist/ReactToastify.css';
import {useState} from "react";
import DropzoneComponent from "../components/mydropzone";
export default function Home() {
    const [textInput, setTextInput] = useState('');
    const notify = () => {
        toast.success("Success! This is a success message.", {
            position: "top-right"
        });
        toast.info("Information message", {
            position: "bottom-left"
        });
        toast.warn("Warning message", {
            autoClose: 5000
        });
        toast.error("Error message", {
            className: 'custom-toast',
            style: {background: 'red', color: 'white'}
        });
    };
    const generatePdf = async () => {
        try {
            const response = await fetch('/api/pdf?url='+textInput);
            const blob = await response.blob();
            const url = window.URL.createObjectURL(new Blob([blob]));
            const link = document.createElement('a');
            link.href = url;
            link.setAttribute('download', 'awesomeIron.pdf');
            document.body.appendChild(link);
            link.click();
            link.parentNode.removeChild(link);
        } catch (error) {
            console.error('Error generating PDF:', error);
        }
    };
    const handleChange = (event) => {
        setTextInput(event.target.value);
    }
    return (
        <div className={styles.container}>
            <Head>
                <title>Generate PDF Using IronPDF</title>
                <link rel="icon" href="/favicon.ico"/>
            </Head>
            <main>
                <h1>Demo Drop Zone and Generate PDF Using IronPDF</h1>
                <DropzoneComponent/>
                <p>
                    <span>Enter Url To Convert to PDF:</span>{" "}
                </p>
                <button style={{margin:20, padding:5}} onClick={generatePdf}>Generate PDF</button>
            </main>
            <style jsx>{`
                main {
                    padding: 5rem 0;
                    flex: 1;
                    display: flex;
                    flex-direction: column;
                    justify-content: center;
                    align-items: center;
                }
                footer {
                    width: 100%;
                    height: 100px;
                    border-top: 1px solid #eaeaea;
                    display: flex;
                    justify-content: center;
                    align-items: center;
                }
                footer img {
                    margin-left: 0.5rem;
                }
                footer a {
                    display: flex;
                    justify-content: center;
                    align-items: center;
                    text-decoration: none;
                    color: inherit;
                }
                code {
                    background: #fafafa;
                    border-radius: 5px;
                    padding: 0.75rem;
                    font-size: 1.1rem;
                    font-family: Menlo,
                    Monaco,
                    Lucida Console,
                    Liberation Mono,
                    DejaVu Sans Mono,
                    Bitstream Vera Sans Mono,
                    Courier New,
                    monospace;
                }
            `}</style>
            <style jsx global>{`
                html,
                body {
                    padding: 0;
                    margin: 0;
                    font-family: -apple-system,
                    BlinkMacSystemFont,
                    Segoe UI,
                    Roboto,
                    Oxygen,
                    Ubuntu,
                    Cantarell,
                    Fira Sans,
                    Droid Sans,
                    Helvetica Neue,
                    sans-serif;
                }
                * {
                    box-sizing: border-box;
                }
            `}</style>
        </div>
    );
}Since IronPDF runs on node only, next add a API for the app where PDF is generate on node
Create a file pdf.js at pages/api folder and add below source code
// pages/api/pdf.js
import {IronPdfGlobalConfig, PdfDocument} from "@ironsoftware/ironpdf";
// Apply your IronPDF license key
IronPdfGlobalConfig.getConfig().licenseKey = "Add Your key here";
export default async function handler(req, res) {
    try {
        const url = req.query.url
        const pdf = await PdfDocument.fromUrl(url);
        const data = await pdf.saveAsBuffer();
        console.error('data PDF:', data);
        res.setHeader('Content-Type', 'application/pdf');
        res.setHeader('Content-Disposition', 'attachment; filename=awesomeIron.pdf');
        res.send(data);
    } catch (error) {
        console.error('Error generating PDF:', error);
        res.status(500).end();
    }
}Note: In the above code add your own license key
Run Your App: Start your Next.js app:
npm run dev
or
yarn dev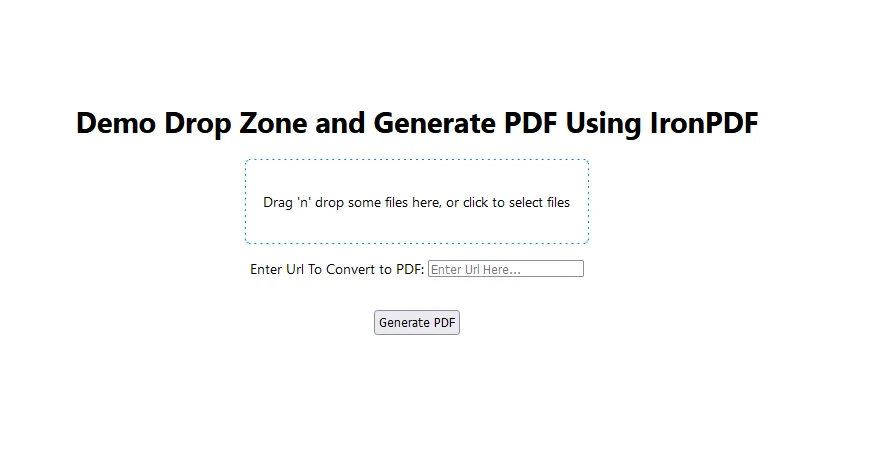
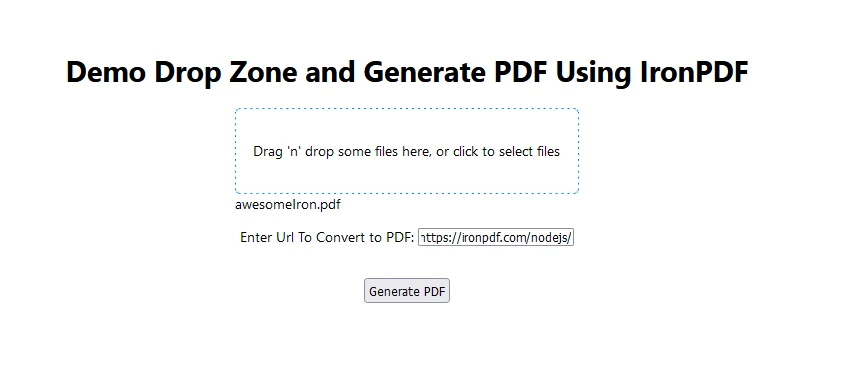
Now Enter website URL to generate PDF and click generate PDF. A file named awesomeIron.pdf as below will be downloaded.
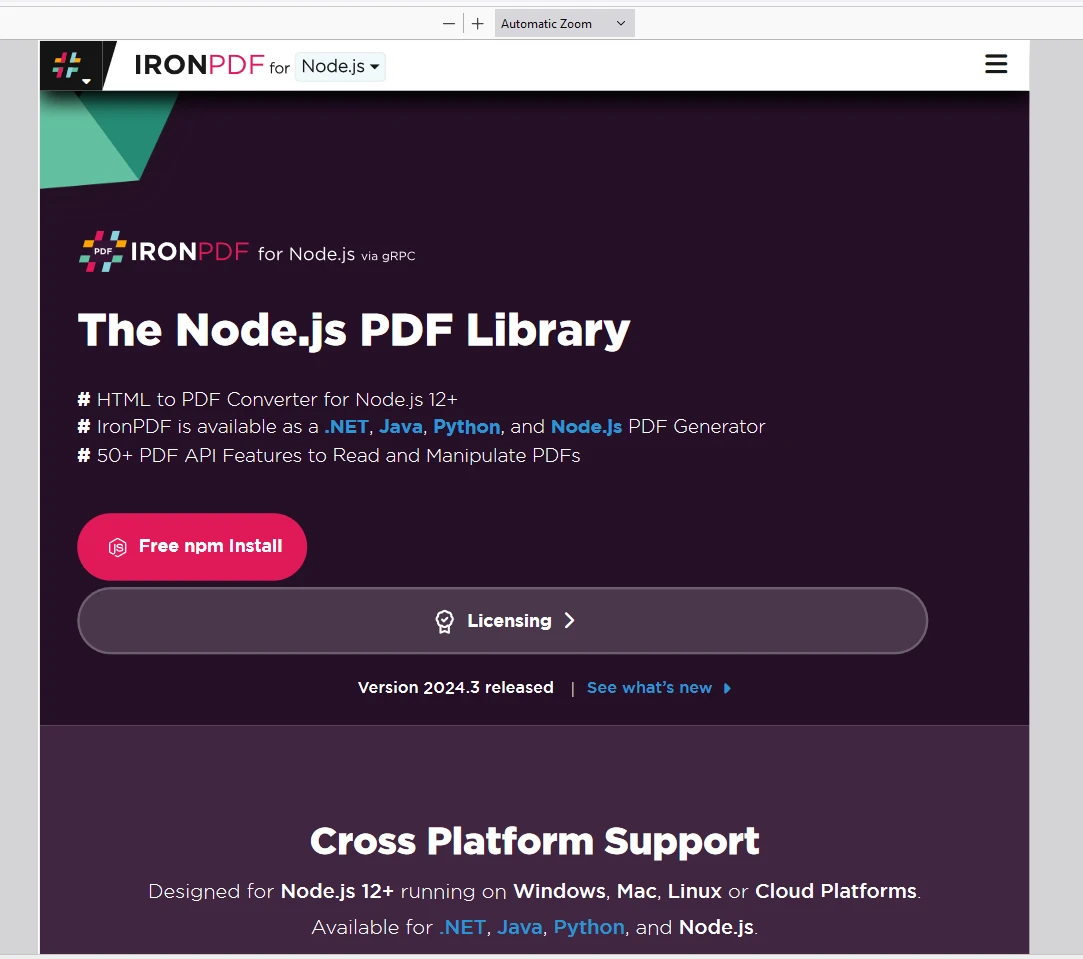
Now click on the Dropzone and select the downloaded file. This will show a preview of the with the name displayed at the bottom: awesomeIron.pdf
IronPDF page.
Place the License Key in the app as shown below:
import {IronPdfGlobalConfig, PdfDocument} from "@ironsoftware/ironpdf";
// Apply your IronPDF license key
IronPdfGlobalConfig.getConfig().licenseKey = "Add Your key here";Integrating Dropzone with React using react-dropzone is a straightforward process that significantly enhances the file upload experience. With features like drag-and-drop, file previews, and extensive customization options, react-dropzone can be a valuable addition to your React projects. Start exploring its capabilities and tailor it to meet your application’s needs!
IronPDF, on the other hand, is a versatile PDF generation and manipulation library which makes it easy to integrate into applications. IronPDF offers thorough documentation and code examples to help developers to get started.
By following the steps outlined in this article, you can create a robust file upload component in your React application and also integrate PDF file generation capabilities into modern applications.