Test in production without watermarks.
Works wherever you need it to.
Get 30 days of fully functional product.
Have it up and running in minutes.
Full access to our support engineering team during your product trial
NuGet is a package manager for .NET that simplifies adding third-party libraries, frameworks, and tools to a project. With NuGet, developers can quickly find and install packages from a central repository, manage dependencies, and update packages to their latest versions. NuGet PowerShell is a powerful tool for managing packages and dependencies in .NET projects. With NuGet PowerShell, developers can quickly find and install packages from a central repository, manage dependencies, and update packages to their latest versions using PowerShell commands.
NuGet PowerShell is an extension of NuGet that provides a PowerShell interface for managing packages. PowerShell is a powerful command-line interface that provides a scripting environment for Windows systems. It is built on top of the .NET Framework, making it an ideal choice for .NET developers who want to manage packages and dependencies using a command-line interface.
In this article, we will cover the basics of NuGet PowerShell and provide an overview of the different PowerShell commands available for managing packages and dependencies in .NET projects.
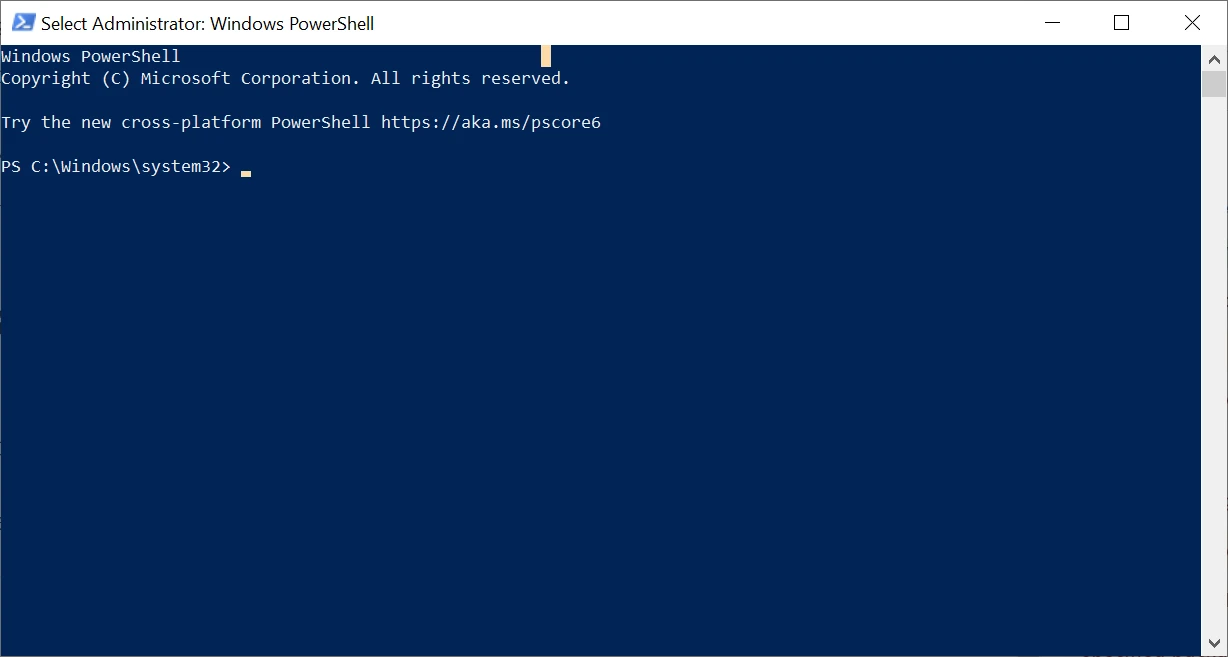
Before we can use NuGet in PowerShell, we need to install the NuGet provider and module. NuGet PowerShell can be installed via the PowerShell Gallery, which is a public repository of PowerShell modules. Here are the steps to take:

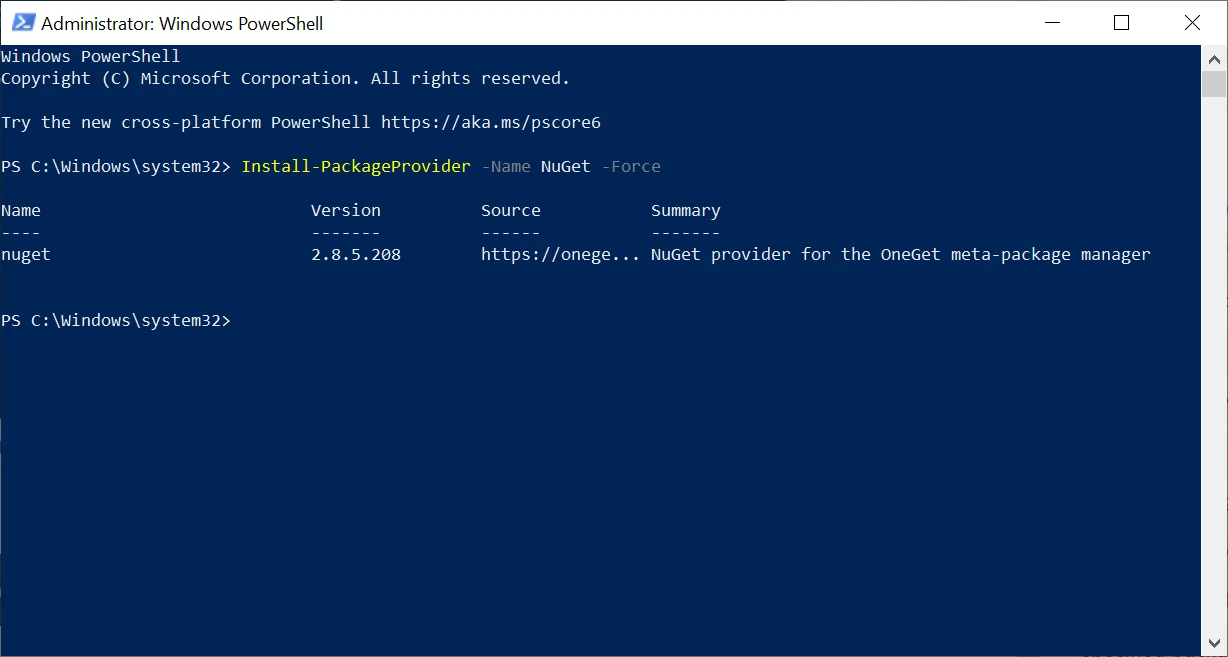
Install the NuGet package provider by running the following command:
Install-PackageProvider -Name NuGet -Force nuget
This command downloads and installs the latest version of the NuGet package provider, which is used to interact with the NuGet repository. NuGet Provider version 2.8.5.208 has been installed in our system. Restart PowerShell is not required.
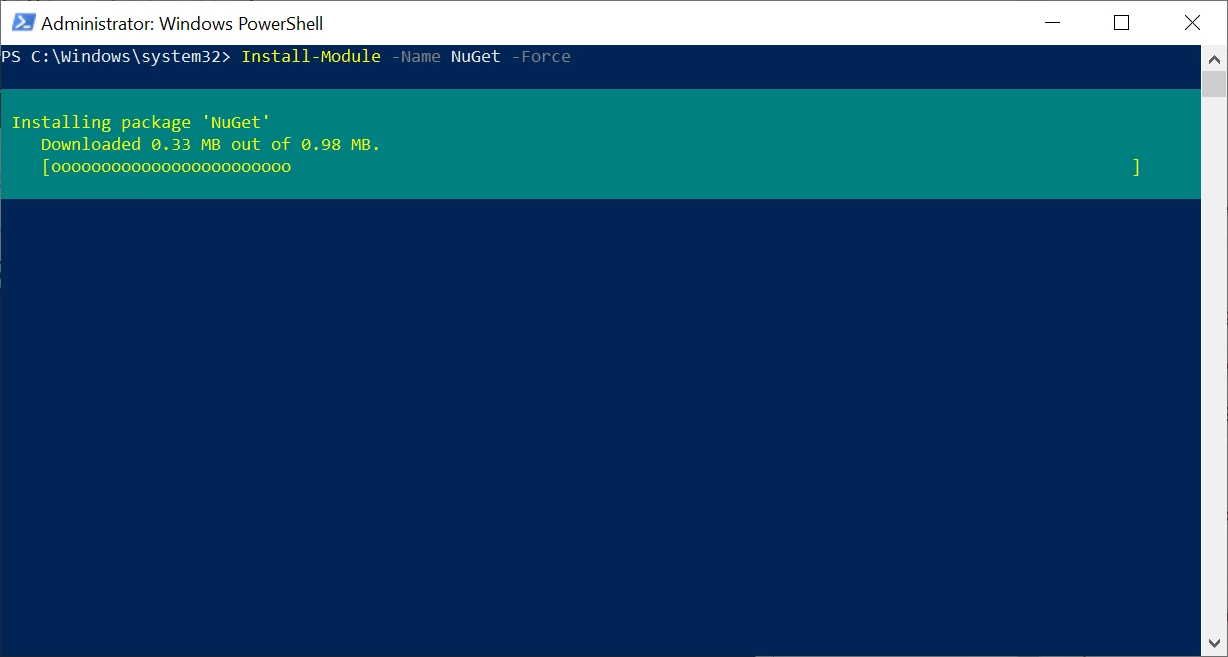
Once the package provider is installed, we need to install the NuGet PowerShell module by running the following command:
Install-Module -Name NuGet -Force
This command downloads and installs the latest version of the NuGet PowerShell module, which provides PowerShell commands for interacting with the NuGet repository.
Verify that the module is installed by running the following command:
Get-Module -ListAvailable -Name NuGet
This command lists all installed modules that match the name "NuGet." If the module is installed correctly, you should see a list of modules that includes "NuGet."
Now that we have NuGet PowerShell installed, we can use it to manage packages and dependencies in our .NET projects. Here are some of the most commonly used PowerShell commands for working with NuGet packages:
The Install-Package cmdlet installs a software package and its dependencies.
Install-Package packageNameOne example of a NuGet package that developers might find useful is the IronPDF package on NuGet. IronPDF is a .NET library developed by Iron Software that allows developers to create and manipulate PDF documents from their .NET applications. It provides an easy-to-use API for creating and editing PDF documents, including support for HTML-to-PDF conversion, page manipulation, and document security protocols. IronPDF is a popular choice for developers who want to add PDF generation and manipulation capabilities to their .NET applications. Using NuGet PowerShell, developers can quickly install the IronPDF software packages and start using them in their projects.
Install-Package IronPDFThis command will download and install the latest version of the IronPDF package and its dependencies.
The Get-Package command can be used to view the installed packages. This command displays a list of all the packages installed on the system, along with their version numbers and dependencies. For example, to view the installed version of the IronPDF package, run the following command:
Get-Package IronPDFThe Uninstall-Package command can be used to uninstall packages from the system. For example, to uninstall the IronPDF package, run the following command:
Uninstall-Package IronPDFThis command will remove the IronPDF package and its dependencies from the system.
NuGet PowerShell also provides the ability to update packages to their latest versions. The Update-Package command is used to update a package to the latest version. For example, to update the IronPDF package to its latest version, run the following command:
Update-Package IronPDFThis command will update the IronPDF package to its latest version and its dependencies.
This command lists all configured package sources. For example, to list all configured package sources, run the following command:
Get-PackageSourceThe NuGet Package Manager Console is a command-line interface (CLI) tool that comes with the NuGet package manager for .NET framework applications. It is designed to provide developers with a powerful way to manage NuGet packages and their dependencies within Visual Studio.
The console allows developers to install, update, and remove NuGet packages from their projects using simple command-line syntax. It also enables users to manage their packages by creating and restoring package references, configuring package sources, and creating package specifications.
One of the significant benefits of using the NuGet Package Manager Console is that it can automate the process of installing and updating packages in a project. Developers can create scripts that automate the installation of packages or set up a build process that uses the console to install required packages before building the project.
Using NuGet Package manager console:
To open the Package Manager Console in Visual Studio, follow these steps:

Using the Install-Package command:
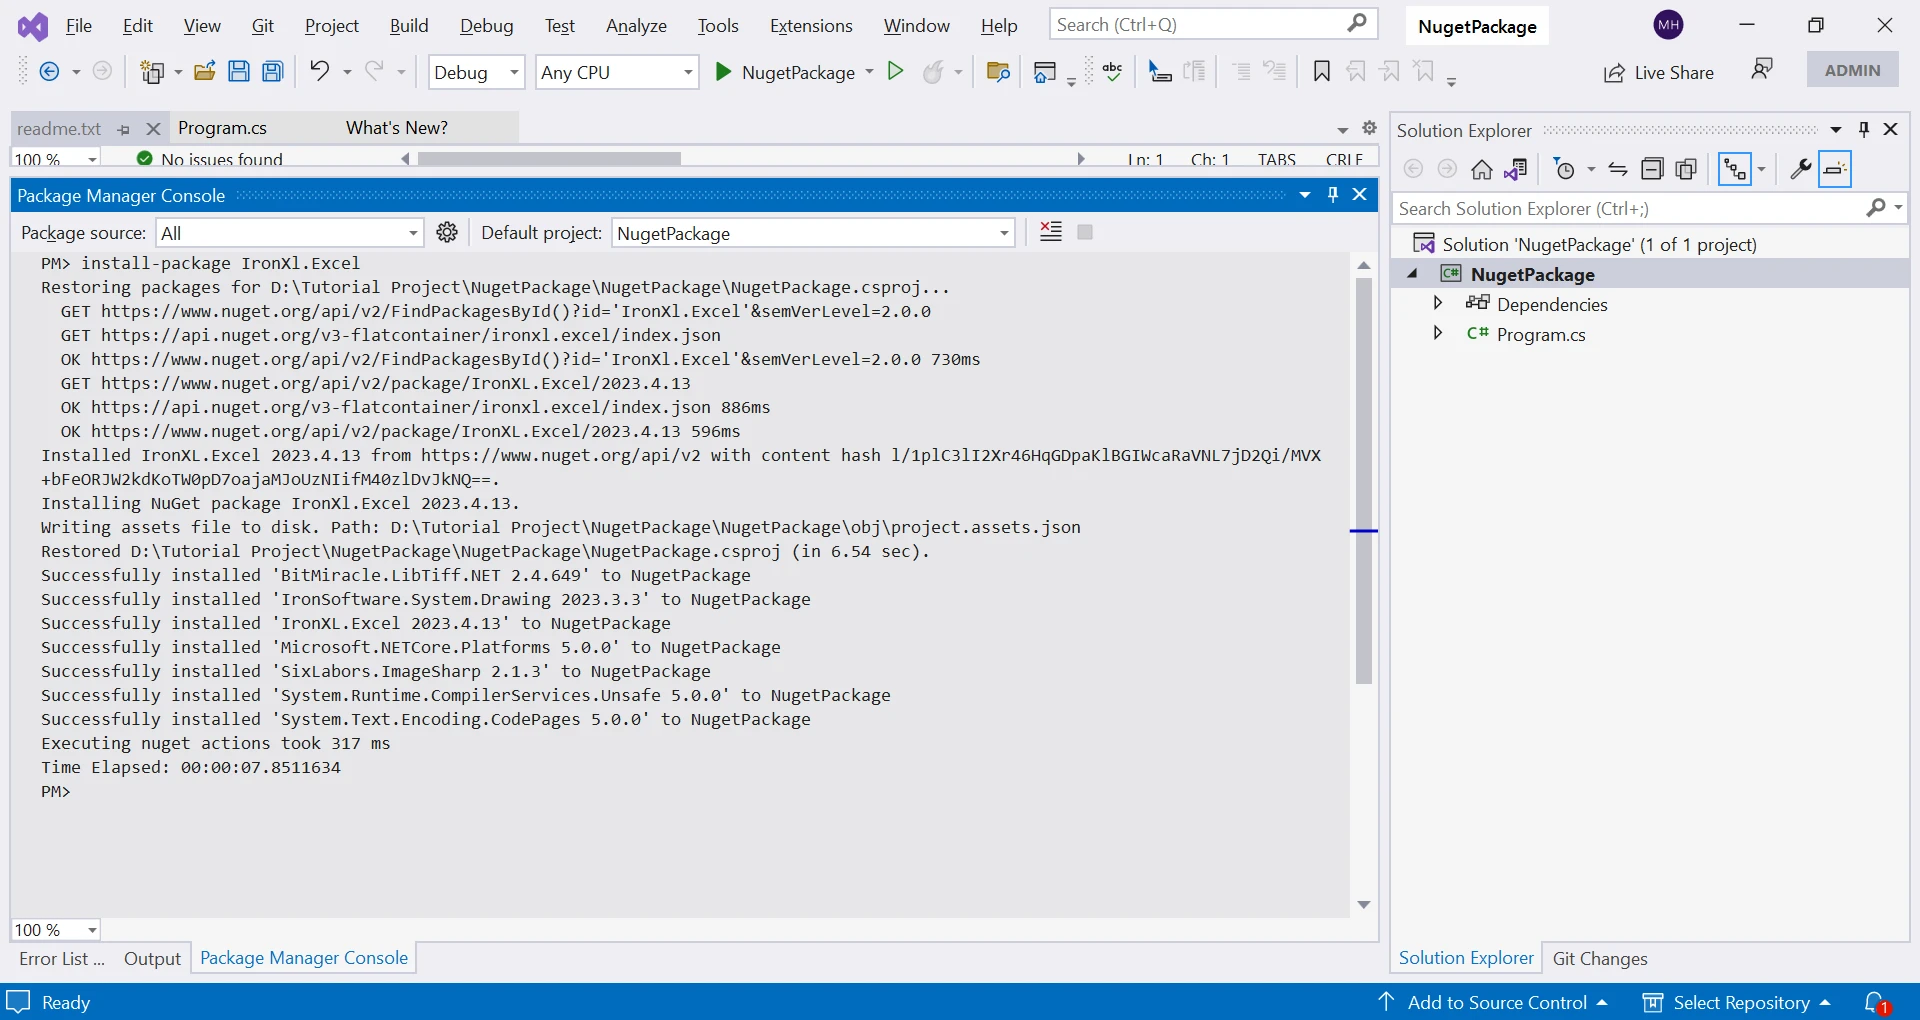
The Install-Package command, just like NuGet PowerShell, is used to install packages from the NuGet repository. For example, to install the IronXL package on NuGet, run the following command:
Install-Package IronXLIronXL is a .NET library that provides a simple and easy-to-use API for reading, writing, and manipulating Excel files. The package supports all Excel file formats, including XLS, XLSX, and CSV, and provides features like cell formatting, formula calculation, data validation, and data filtering. With IronXL, developers can create powerful Excel-based applications quickly, without the need for Microsoft Office or any other third-party software. The package is available on NuGet, supported security protocols, and its documentation provides detailed examples and guides to help developers get started with using the library.

NuGet PowerShell is a command-line tool that allows developers to interact with NuGet packages using PowerShell commands. Unlike the NuGet Package Manager Console, which is a dedicated console tool for package management within Visual Studio, NuGet PowerShell can be used outside of Visual Studio and across different platforms. This makes it an ideal choice for developers who prefer to work outside of Visual Studio or use cross-platform development environments.
Additionally, NuGet PowerShell provides a more extensive range of features, including package creation, repository management, and version control, which gives developers greater flexibility and control over their packages. Overall, while both tools are useful for managing NuGet packages, NuGet PowerShell is a more versatile option that offers advanced features and cross-platform support.
NuGet PowerShell is also extensible, allowing developers to create custom packages and modules. Developers can use NuGet to create packages that include their own libraries and tools and then use NuGet PowerShell to install and manage those packages. This makes it easy for developers to share their code with others and reuse code across multiple projects.
NuGet PowerShell is an essential tool for any .NET developer who wants to manage package installation and dependencies. It provides a simple and powerful command-line interface for interacting with NuGet packages such as IronPDF and IronXL, making it easy to install and update packages. By leveraging NuGet PowerShell, developers can streamline their development processes, automate package management, and improve application stability.